Creating DIY cosmetics is both a passion and an art. But let’s be honest, sometimes we get carried away with excitement and before we know it, we’ve stocked up on ingredients we barely use or splurged on something that doesn’t add much value.
If you want to maximize your ingredients while keeping your budget under control, here are my top 8 tips to avoid waste when making DIY cosmetics!
1. Avoid Expensive Ingredients in Rinse-Off Products
Think twice before using pricey ingredients in products that won’t stay long on your skin! Cleansers and shower gels are in contact with your skin for just a few seconds, meaning most of the active ingredients get washed away before they can actually bring any benefit.
Instead of adding Ceramides III, Q10 or high-end botanical extracts, focus on ingredients that improve texture and are conditioning, like hydrolyzed wheat protein (which I absolutely love in shower gels, it makes all the difference!). If you have sensitive skin, soothing ingredients like calendula oil are great (especially in scrubs), but instead of using a costly calendula CO2 extract, save that for a leave-on product where it can truly benefit your skin.
When it comes to oils, my go-to for rinse-off products is sunflower oil: it’s lightweight, non-comedogenic and budget-friendly. Save your prickly pear oil or other luxurious oils for serums and creams where their benefits can actually shine.
A smart trick? Use oils that are close to expiring in your rinse-off products (just make sure you’ll use them up before their expiration date!).
2. Don’t Overbuy & Track Expiration Dates
It’s tempting to buy every fascinating new ingredient you come across, but let’s be realistic: many ingredients have a reduced shelf life and if you don’t have a plan for using them, they might expire before you even get started!
I highly recommend keeping an ingredient tracker (I even made an Excel template for this, download it here!). It helps you track expiration dates and avoid waste. If an ingredient is close to expiring, prioritize using it in your next formulation!
Read this blog post with more info about how to properly plan your ingredients shopping.
3. Be Smart with Ceramides & Other Costly Actives
Ceramides are an amazing ingredient for restoring the skin barrier and I highly recommend them. However, they’re expensive, so use them wisely. If you’re using Ceramides III, there’s no need to also add ceramide-rich oils like oat oil or wheat oil, unless you want them for their other properties. The same logic applies to soothing ingredients: if you’re already using bisabolol, you don’t necessarily need to add calendula oil at the same time.
Don't get me wrong: combining different ingredients that target the same function from different angles can create a powerful synergy. If your goal is to create a super luxurious, high-end formula, go for it! But if you want to be budget-conscious, keep an eye on what’s truly necessary.
4. Reserve Hydrosols for Where They Matter Most
I adore hydrosols like rose water and witch hazel. They smell divine and have great properties. But they lose some of their benefits when heated, so if you’re making a formulation that requires high temperatures, it might be smarter to just use distilled water and add active ingredients separately.
Also, if you’re using a hydrosol purely for its scent, make sure the final product will actually showcase it. For example, if you add rose hydrosol to a cream but also use overpowering essential oils, the rose scent will be lost. Better to just use water in that case!
Same goes for floral waxes like jasmine or rose wax: their beauty is in their aroma, so don’t let other strong scents overpower them!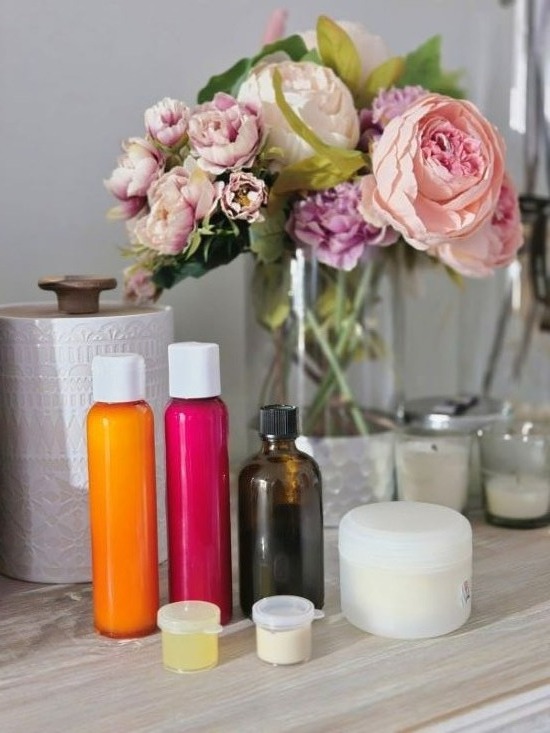
5. Use Liposoluble Hyaluronic Acid Only Where Needed
Liposoluble hyaluronic acid is a game-changer for oil-based products like lip balms and solid lotions, where traditional water-based hyaluronic acid wouldn’t work. But here’s the thing: it’s more expensive and harder to find than regular hyaluronic acid.
So, don’t use it in emulsions where you can just go for the hydrosoluble version! And, of course, never add it to water-based formulations: it won’t dissolve!
Click here to read all you need to know about liposoluble hyaluronic acid in DIY Cosmetics!
6. Make Small Batches
I can’t stress this enough: start small! DIY cosmetics made in our kitchen don’t have the same shelf life as commercial products, so making huge batches isn’t practical unless you’re giving them as gifts.
For example, a 10-33 g batch of lip balm can last for months. There’s no need to make 100 g unless you’re planning to give some to your friends. I personally try to use all my homemade cosmetics within 3 months to ensure freshness.
Also, if you’re testing a new formula, make a tiny batch first. If it doesn’t turn out the way you hoped, at least you didn’t waste a ton of ingredients! If you are still unsure about the results and you are focusing on the texture of a formula, add expensive actives only when you know that you have a proper base before.
7. Wisely Repurpose Scraps
We’ve all had those moments where a product didn’t turn out quite right. Instead of throwing it away, think about how you can repurpose it!
- A too-heavy face cream? Use it as a body lotion instead.
- A face cream batch that is too simple because you made it for texture purpose tests only? Try using it as a makeup remover (as long as the ingredients are eye-safe, otherwise use it on the rest of the face only!).
8. Use the Right Dosage
Using less of an ingredient than recommended just to save money is actually a waste, because if it’s not at an effective concentration, you might as well not use it at all. On the other side, using more isn’t always better either!
For example, Ceramides III work well at 0.2%, so I stick to that. Some plant extracts are often recommended at 5%, but depending on their potency, 3% might be enough—and in some cases, going too high can actually cause irritation.
For plant extracts, it’s usually recommended to use a standard 5%, but if you do some research, you might find that in some cases 3% is just as effective and less irritating. Some extracts made with water and glycerin are milder and work well at 5%, while those made with water and alcohol might be more potent and effective at a lower percentage.
Also, when making infused oils, lightly grinding the plant can result in a more concentrated extraction, requiring less oil for the same benefits. If you don’t grind the plant, you’ll need more oil and a higher usage rate to achieve similar effects.
Always check studies or manufacturer recommendations to find the sweet spot between effectiveness and cost-efficiency!